If you’ve ever dreamed of cooking your own pizza in the open air, a DIY pizza oven could be the perfect project for your own back garden. More than just a trendy garden feature, a wood-fired pizza oven brings people together around good food and great flames. It’s an opportunity to bake everything from crackling crusted bread to bubbling mozzarella pizza, all from your own handmade oven.
This guide offers practical, no-nonsense tips and step-by-step instructions to help you build a pizza oven that doesn’t just look good but retains heat well and stands the test of time. Whether you’re working with breeze blocks, reclaimed bricks or good old-fashioned clay, you’ll find everything you need to start building your own wood-fired haven right here.
Planning Your DIY Pizza Oven
Before you start building your DIY pizza oven outdoors, it’s essential to plan it properly. Good planning saves time, money, and a lot of frustration later on. First things first – space. Choose a safe, open area in your garden, preferably on firm ground, away from fences, sheds, or anything flammable. You’ll want enough room to move around the oven and manage the fire comfortably.
Next, decide on the size and shape of your pizza oven. Are you aiming to cook one pizza at a time or several? Will you also want to bake bread or pastry? The answers will determine how large your oven floor, dome, and door need to be. A typical home-built wood-fired oven is around 1 metre in diameter, which gives you plenty of surface to work with.
Think through the basic structure: you’ll need a strong base, often made from breeze blocks or bricks, topped with a layer of concrete. On top of that goes the oven floor, then a sand mould to help form the dome, covered in layers of clay, insulation, and finally a roof for protection. You’ll also need a chimney to direct smoke and manage airflow during cooking.
Make a materials list early. You’ll likely need:
- Bricks or stones
- Clay and sand
- Cement or concrete
- Wood for the fire
- Buckets for mixing
- Tools for shaping and layering
With your plan in place, you’re ready to create something brilliant – starting from the ground up. Up next: prepping your base and laying the foundation for the ultimate wood-fired experience.
Gathering Materials & Preparing the Base
Now that your plan is sorted, it’s time to roll up your sleeves and start building. Everything rests on a strong, level base, so don’t rush this stage – it’s the backbone of your DIY pizza oven.
Begin by marking out the shape and size of the oven floor directly on the ground. A circular layout works best for wood-fired ovens, helping retain heat and circulate it evenly during cooking. Once marked, dig down about 15–20 cm to create a shallow trench for your foundation.
Next, mix and pour a solid concrete base. Use a few buckets of sharp sand, gravel, and cement, mixed to a thick, even consistency. Spread the mix evenly in the trench and tamp it flat. Let this first layer cure for 24 to 48 hours – this is crucial for structural strength and long-term durability.
After curing, build up your base using breeze blocks or reclaimed bricks. Dry-stack them to your desired height (typically around 70–90 cm) to bring the oven to a comfortable working level. For stability, use cement mortar between the blocks. You can even cover the blocks with decorative stones or tiles for a more finished look later on.
Tips to remember:
- Check for level at every stage. An uneven base will cause problems with your oven floor later.
- Add insulation between your base and the oven layers to help retain heat.
- Ensure proper airflow clearance – this will come in handy when you light your fire.
With your foundation secure and dry, you’re ready to move on to constructing the part that will take the most heat – the oven floor and the dome itself.
Building the Oven Floor and Dome
With your base ready, it’s time to build a pizza oven that delivers the real flavour – starting with the oven floor. This is where all the magic happens, so choose your materials carefully.
The Oven Floor
Lay bricks or fire bricks snugly side by side on top of a layer of dry sand. Make sure they form a smooth, level surface – this is where your pizza will cook. You don’t want bumps or gaps that could snag your dough or cause uneven baking. Dry-lay first, then lock in place with a gentle tap and fine sand between the joints.
Forming the Dome
To create the dome, start with a mould. Use wet sand to pile up a dome shape in the centre of your oven floor, about 30–40 cm high for a standard-sized oven. Smooth the shape and cover it in damp newspaper – this prevents your clay sticking to the sand.
Mix a batch of clay and sand (roughly 1 part clay to 2 parts sand). Apply this mixture over the sand dome in 7–10 cm thick layers, smoothing as you go. This is your structural shell – the part that will retain heat, direct flame, and form the internal cooking chamber. This first layer needs to dry slowly and evenly – rushing this step may cause cracks.
Once dry, carefully break open the door area, then scoop out the sand inside. What remains is your basic wood-fired oven, with a solid dome and ready-for-action interior.
Tips:
- Keep the chimney in mind: leave a gap or opening near the top front of the dome to install it later.
- Maintain consistent thickness to avoid weak spots.
- Let each layer dry thoroughly – at least a full day, ideally more.
This part of the project takes some care, but it’s where your DIY pizza oven really takes shape. With the dome built, you’re halfway there. Next comes insulation, finishing touches, and – finally – firing it up.
Insulating the Oven
Once the dome has fully dried, the next crucial step is insulation. This layer ensures your DIY pizza oven stays hot for longer, giving you enough time to bake multiple pizzas, bread, or pastries with one good fire.
Start by mixing a loose, insulating blend of clay, sand, and optionally straw or wood shavings. Some people also use perlite or vermiculite if available. This layer should be applied all over the dome – at least 5–10 cm thick – to retain heat efficiently. Press it in place gently but firmly, keeping the form even.
After this insulating layer is on, let it dry completely. You might notice small cracks as it dries – this is normal. You can patch them with more clay mix or a thin cement skim if needed.
Once dry, apply a weather-resistant cover – often a cement or lime plaster mix – to seal and protect the insulation. This outer shell doesn’t need to be thick, but it should resist rain and help prevent erosion of the insulation underneath.
Insulation Tips:
- Don’t skip this step – wood-fired ovens without proper insulation lose heat quickly.
- Let each layer dry for at least 24 hours before moving to the next.
- If you’re short on materials, old blankets or buckets filled with sand can temporarily cover the dome to help hold heat in during early use.
At this point, you’ve built a functional oven – but a few thoughtful additions will take your finished oven from good to great.
Adding Finishing Touches
Now that your wood-fired pizza oven is structurally complete, it’s time to create the finishing elements that make it easier to use, longer-lasting, and even more impressive.
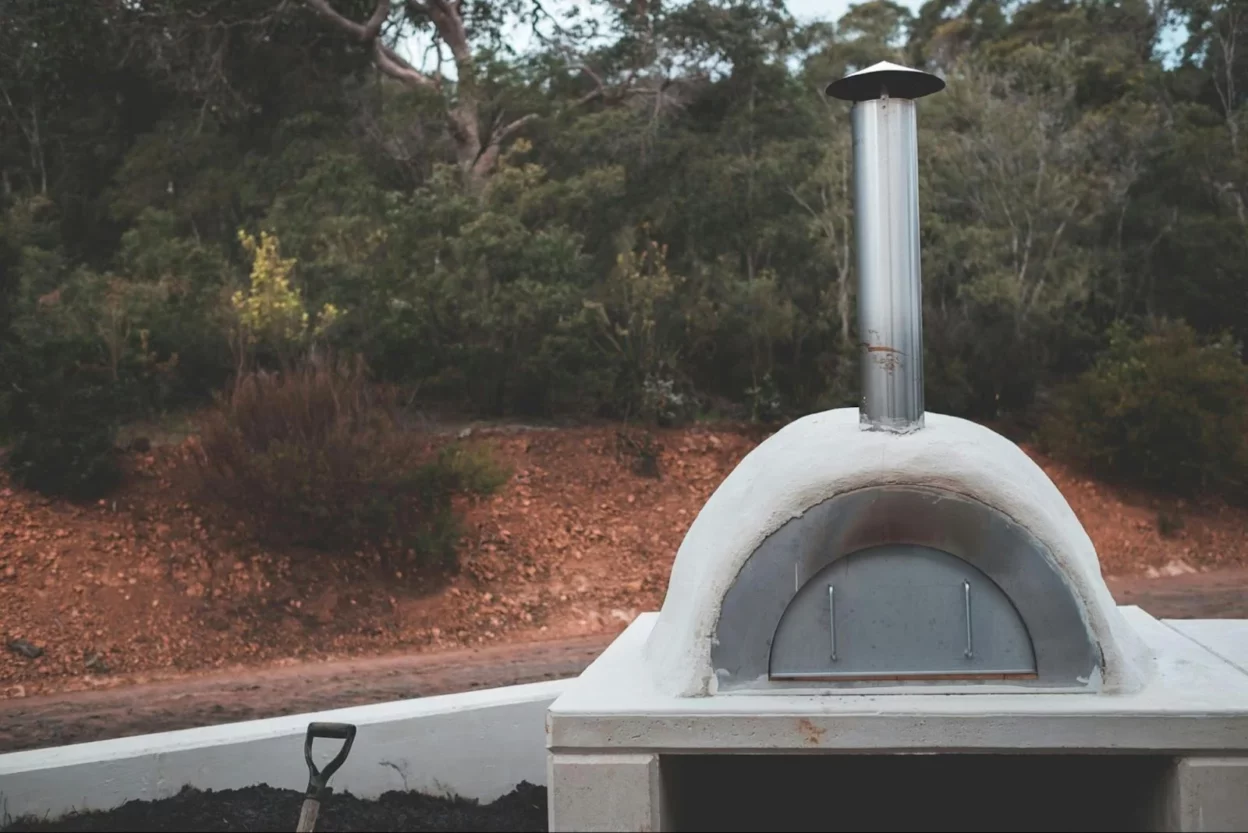
Chimney Installation
Start with the chimney. If you haven’t left a gap for it already, you can form a hole at the front-top of the dome. Use a short length of metal or clay flue pipe – around 10–15 cm in diameter – to direct flame and smoke upward. This improves airflow and helps your fire burn hotter and more efficiently.
The Oven Door
Next, build a door to control heat during cooking. A removable wooden door (soaked or wet before use) works well. You can also make one from metal with insulation inside. The door traps heat, making it easier to bake slower foods like bread after the fire has died down.
Protective Roof or Shelter
Finally, consider adding a simple roof over the entire oven to shield it from the elements. Even a small overhang made from reclaimed timber or corrugated sheeting helps keep rain off the oven and prolong its life. If you want a more rustic look, cover the area in natural stones or timber.
Decorative Touches (Optional)
You can create decorative edging using old bricks, mosaic tiles, or even coloured cement. This doesn’t just improve the look – it also makes your DIY pizza oven feel truly personal.
With these final additions, your own pizza oven project is nearly complete. All that remains is to light it up, test it out, and enjoy that first perfectly cooked slice.
Firing Up: How to Use Your Oven
Your DIY pizza oven is finally ready to light – but don’t rush into full flames just yet. The first few firings should be gentle to finish drying the oven and prevent sudden cracks.
Initial Firing
Begin with a small fire in the middle of the oven floor, using dry wood or kindling. Let it burn for an hour or so. Gradually add pieces of larger wood as the oven warms up. This step is essential – start slow and increase intensity over a few days.
Once you’re ready for full use, build a bigger fire, maintaining flames for up to two hours. A properly heated wood-fired oven can hit high temperatures over 400 °C, ideal for pizza. You’ll know it’s ready when the dome turns white from the intense heat and the internal soot burns away.
Cooking in Your Oven
After reaching the desired temperature, push the embers to the side or back of the oven floor and let the surface settle slightly. You can sprinkle flour on the floor – if it browns in a few seconds without burning, you’re good to go.
Cook pizza first when the oven is hottest. After the flames die down, you can bake bread, pastry, or roast meat and veg using residual heat.
Tips:
- Always use dry, seasoned wood for cleaner burn and hotter flames.
- Preheat long enough; rushing will only result in undercooked food.
- Keep a long-handled peel or metal tray ready to slide pizzas in and out.
Maintenance Tips and Common Mistakes
Maintaining your wood-fired pizza oven regularly ensures it stays in excellent condition. These simple checks and habits will help avoid repairs and keep your finished oven performing beautifully for years.
Maintenance Tips:
- Inspect the oven for cracks before and after use. Minor ones are normal and can be patched with a clay and sand mix.
- Keep the oven dry. If it’s exposed to rain, cover it with a tarp or build a roof to prevent water soaking into the layers.
- After cooking, let the oven cool down naturally – don’t add water to clean it while hot, as this can cause cracks.
- Occasionally clean ash from the oven floor, but leave a thin layer to help retain heat.
Common Mistakes to Avoid:
- Rushing the build: Skipping drying times or not allowing layers to fully cure will lead to structural issues.
- Using wet materials: Whether it’s damp wood for firing or a soggy clay mix, excess moisture weakens your oven and hinders performance.
- Incorrect chimney placement: Your chimney should sit above the door, not in the centre, to ensure a strong draft and proper flame flow.
- No insulation: Ovens without insulation lose heat fast and waste wood.
Following these tips will keep your DIY pizza oven cooking like a dream, helping you enjoy that unmistakable wood-fired flavour every time.
Conclusion
Building your own DIY pizza oven isn’t just a weekend project – it’s a long-term investment in better food, great gatherings, and a stronger connection to what you cook. With nothing more than sand, clay, bricks, and a bit of effort, you can create a wood-fired masterpiece right in your own back garden.
From the first layer of concrete to the finishing touches on your roof, every stage brings you closer to that perfect, bubbling pizza or fresh-baked bread. Follow these step-by-step instructions, take your time, and remember – each crack patched, each fire lit, and each pizza pulled from the oven is part of learning and owning the experience.
So gather your wood, get your hands dirty, and start building. There’s nothing quite like pulling your first slice from an oven you built yourself. It’s hotter, tastier, and 100% yours.

Lexy Summer is a talented writer with a deep passion for the art of language and storytelling. With a background in editing and content creation, Lexy has honed her skills in crafting clear, engaging, and grammatically flawless writing.